 Published Sep 16, 2026
  7 min read
  87 views
Google Docs doesn't put a dedicated "Text Box" button on its main web toolbar, so many people assume the feature is missing. It isn't — creating one takes just a few clicks once you know where to look. This guide covers four distinct web methods for adding a text box in Google Docs, from floating drawing shapes to clean inline callout boxes, so you can pick the approach that fits your layout, your accessibility needs, and how you plan to share the finished document. Whether you want to insert text boxes in Google Docs with a floating shape, or line several text boxes in Google Docs up into a tidy layout, there is a method here for you.
Comparing Google Docs text box methods
There are four reliable ways to create a text box in Google Docs on the web. Here is how they stack up before we break each one down step by step.
| Method | Best for | Text wrapping flexibility | Screen reader accessible? |
|---|---|---|---|
| Drawing tool | Floating, custom-placed boxes | High (in line, wrap, break, behind/in front) | Only with added alt text |
| 1x1 table | Clean, responsive alignment | Inline; expands with text | Yes |
| Custom shapes | Styled callouts and sidebars | High (drawing object) | Only with added alt text |
| Paragraph border | Accessible inline callouts | Inline; scales across browsers | Yes |
Method 1: Add a text box using the drawing tool (most flexible)
The Drawing tool is the primary native way to insert a text box in Google Docs, and it gives you the most control over placement and style.
Step 1: Open the drawing canvas
Place your cursor where you want the box, then go to the top menu and click Insert, hover over Drawing, and select + New.
Step 2: Draw and style your text box
Click the Text box icon (the square with a "T"), drag on the canvas to set the dimensions, and type your content. Use the drawing toolbar to customize the fill color (the paint bucket), the border color, the border weight, and the dash style until the box matches your document.
Step 3: Insert and position in your document
Click Save and Close to drop the box into your page. Beneath the inserted box you can adjust text wrapping — choose In line, Wrap text, Break text, Behind text, or In front of text — to control how surrounding paragraphs flow around it.
Method 2: Create a text box using a 1x1 table (best for clean alignment)
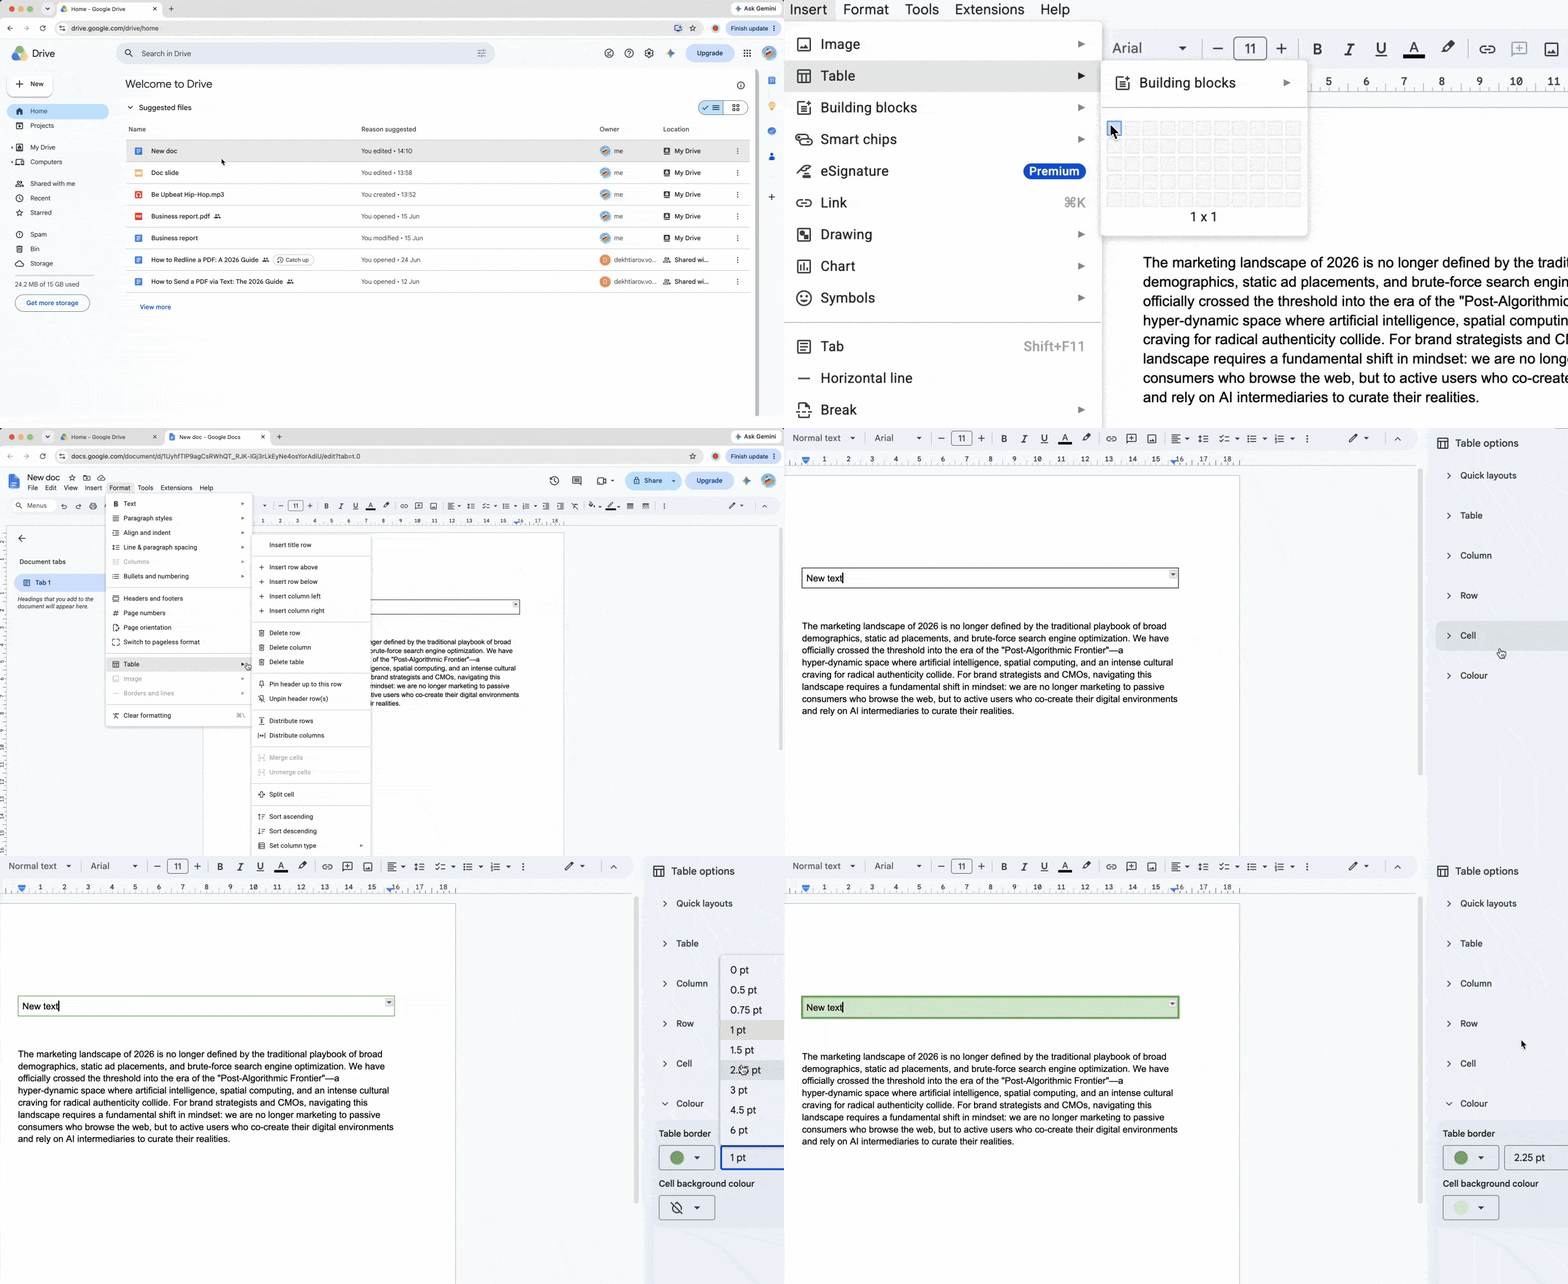
A single-cell table behaves like a tidy, responsive text box that stays in the document flow.
- Click Insert > Table and select a 1x1 grid.
- Type or paste your text inside the cell.
- Click Format > Table > Table properties to adjust border width, border color, cell background color, and cell padding.
Unlike drawing objects, table text boxes automatically expand as you add long paragraphs, so nothing gets clipped.